PyUI programs must call the pyui.init() method to initialize PyUI. This method creates a renderer which created the main window, and sets up PyUI internals ready to run the program. It may also switch to full-screen mode if that was specified. The arguments to pyui.init() are:
width - the width of the main window in pixels
height - the height of the main window in pixels
renderer - the name of the renderer to use
fullscreen - a flag to specify whether to enter fullscreen mode
The renderers that come with PyUI are:
"null" - A null renderer that doesn't actually renderer
anything
"2d" - PyGame two-dimensional renderer
"gl" - an OpenGL renderer implemented using PyOpenGL
"tk" - a Tk canvas renderer. (experimental)
"win32" - a win32 GDI renderer (experimental)
A "dx" Direct 3D renderer written in C++ also exists, but it is not included in the PyUI distribution.
For example, to initialize PyUI in fullscreen OpenGL mode at 640x480 resolution:
pyui.init(640, 480, "gl", 1)
PyUI runs in "game" mode by default. This means that as the PyUI program runs, it must continuously render to the screen and update the event queue. To this, there are two methods which must be called in the "main loop" of the application - the draw() method and the update() method..
There are two options for the main loop - to use the default PyUI main loop, or to write your own. The PyUI default main loop is extremely simple:
def run(self, callback=None):
    """This is a default way of _running_ an application using
    the current renderer.
    """
    global gRunning
    while gRunning:
        if callback:
            callback()
        else:
            draw()
            update()
This loops calls draw and update, and optionally calls a user defined callback method every time through the loop. One iteration of this loop is called a "frame". It is implemented in the renderer - some renderers have special main loops that must be used.
Sometimes, when PyUI is being integrated into an existing application, it is not desirable to use the default main loop. In these cases, developers are free to call draw and update from their own code - as long as they are called frequently enough.
A side effect of game mode is that the PyUI program will use ALL the cpu on the machine it is running on. For some applications this is the desired situation, but for others it is excessive. PyUI can also run in "application" mode where is doesn't consume all the CPU, but blocks in the update() method until it gets new events.
Once we have initialization and a main loop, we are ready for the simplest of PyUI programs. Here it is below:
import pyui
pyui.init(604,480,"gl")
pyui.run()
pyui.quit()
This program will display an empty window frame. You can exist by pressing the Escape key. It uses the default main loop. Notice the call to pyui.quit() - this performs cleanup functionality when the program is ready to exit.
Once we have PyUI running, we want to create some GUI elements so that we can interact with it. For the first example we will create a Frame with a button in it that prints out a message when the button is pressed.
To create a simple Frame the position and size in pixels must be supplied plus a title for the Frame:
newFrame = pyui.widgets.Frame(10, 10, 200, 200, "hello world!")
Now create a button to go within the Frame:
newButton = pyui.widgets.Button("press me", onPress)
Notice that the button takes a method as its second argument. This method will be called when the button is pressed and passed a guiEvent object. Let's define the method onPress:
def onPress(event):
    print "the button was pressed"
Note that the onPress method must be define before the Button is created. The button must be added to the frame before it will be visible and the pack() method must be called on the Frame to layout the button in the right place. By default, Frames have a FlowLayoutManager that places widgets within them next to each other horizontally.
newFrame.addChild(newButton)
newFrame.pack()
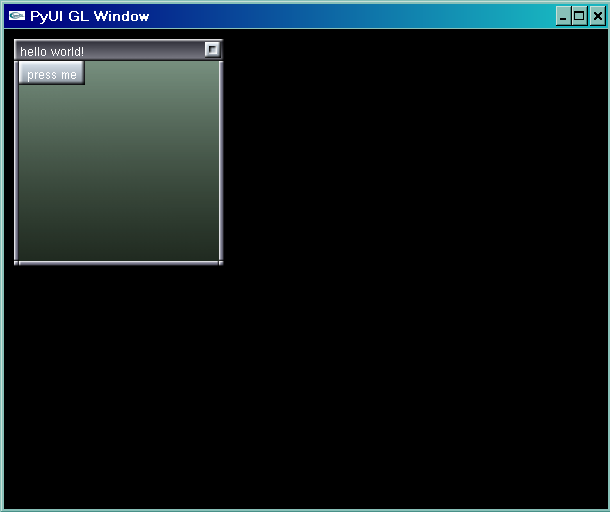
So, the finished program that displays a frame with a button in it is:
import pyui

def onPress(event):
    print "the button was pressed"

pyui.init(604,480,"gl")
newFrame = pyui.widgets.Frame(10, 10, 200, 200, "hello world!")
newButton = pyui.widgets.Button("press me", onPress)
newFrame.addChild(newButton)
newFrame.pack()
pyui.run()
pyui.quit()
When running this little application, you should be able to move the Frame around by dragging the title bar, and to resize it by dragging the lower right corner. The button should display its text at the command like where it was invoked each time it is pressed. It should look something like:
(C) Sean Riley 2002